NAPSTIX USAGE INSTRUCTIONS
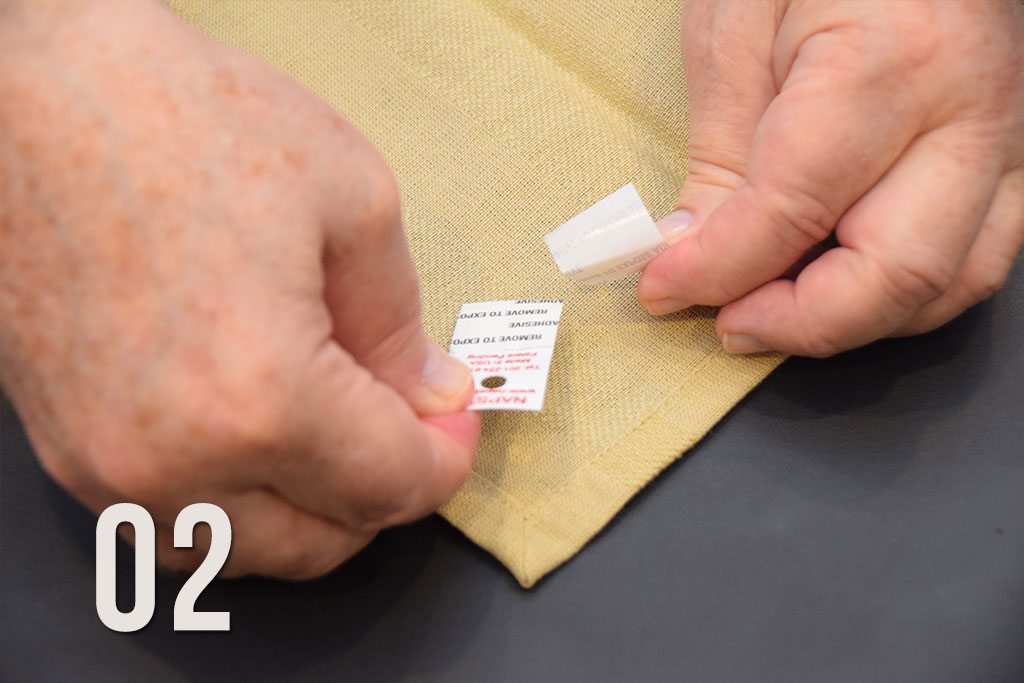
1.) Peel back and remove the black printed liner on back side of NAPSTIX to expose the clear, tacky adhesive under the liner and discard liner. (see picture 1)
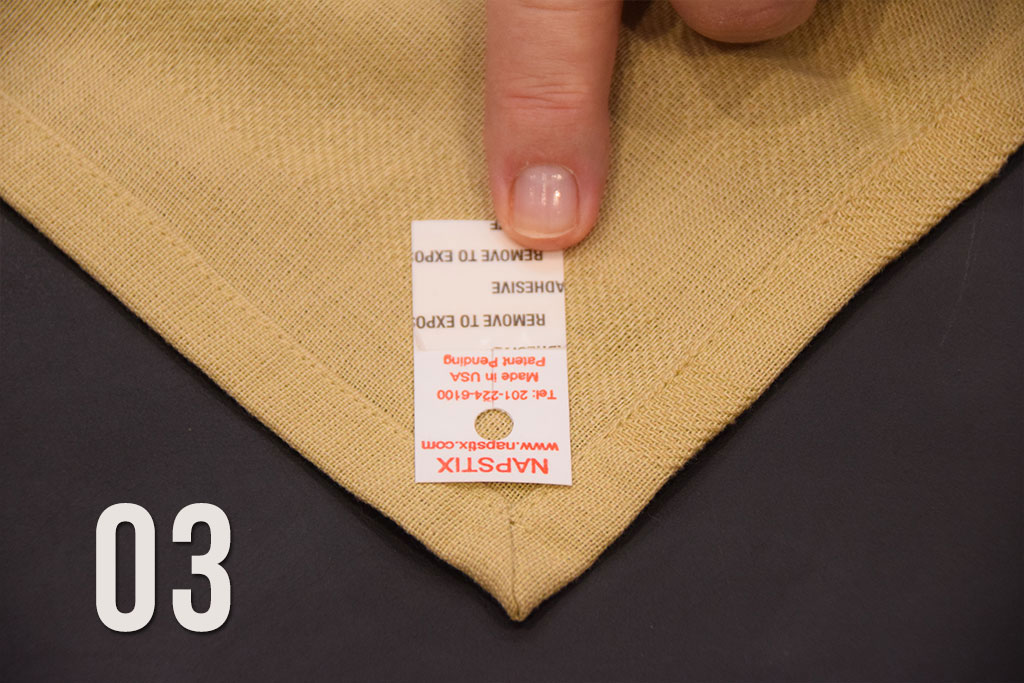
2.) Position the exposed adhesive side of the NAPSTIX onto the back side side of the napkin with punch hole close to a corner of the napkin. (see picture 2).
3.) Affix the NAPSTIX to the napkin by pressing down and applying pressure so the clear adhesive on the back side of the NAPSTIX sticks to the napkin. (see picture 3).
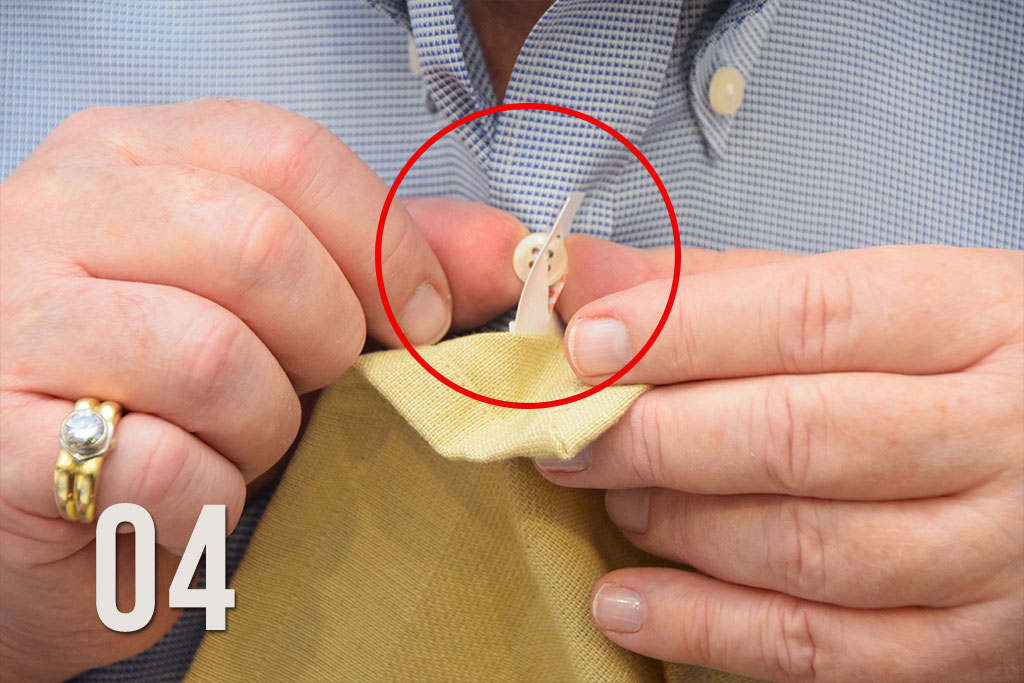
4.) Insert a button located HIGH up on shirt through the die cut punch hole in the extended portion of the NAPSTIX which is not stuck to the back of the napkin. (see picture 4)
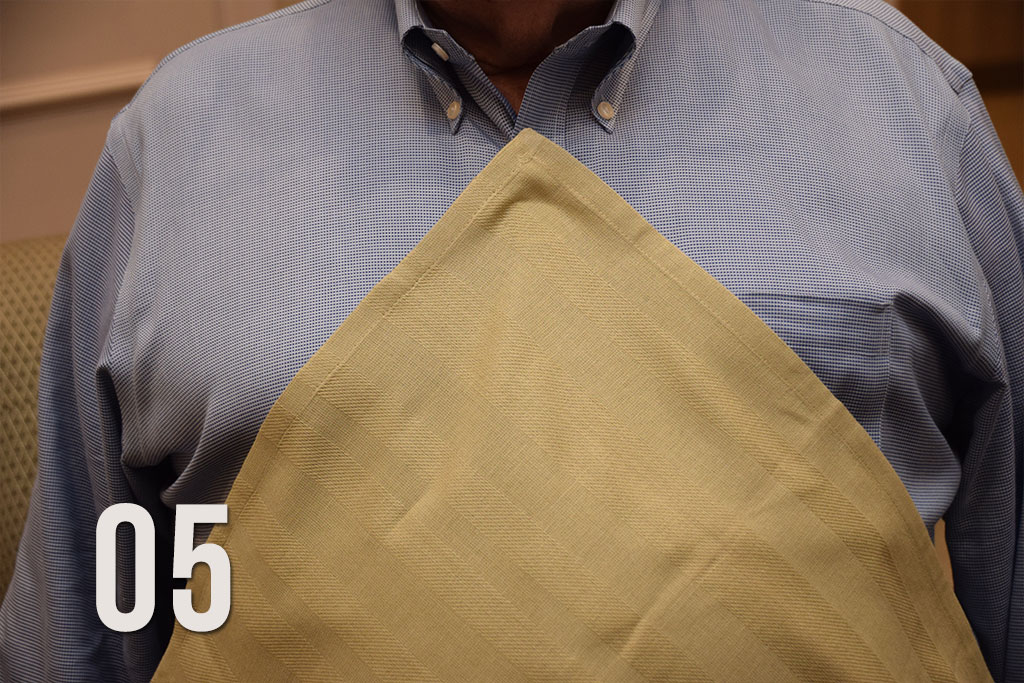
5.) Positioning and buttoning the NAPSTIX-Napkin combination HIGH up onto your shirt or blouse allows for maximum protection from food stains and drink splatters. (see picture 5)

NAPSTIX USAGE INSTRUCTIONS
1.) Peel off black printed liner from the back of two (2) different NAPSTIX to reveal the clear, tacky adhesive and discard liner. (see pictures 1 and 6)
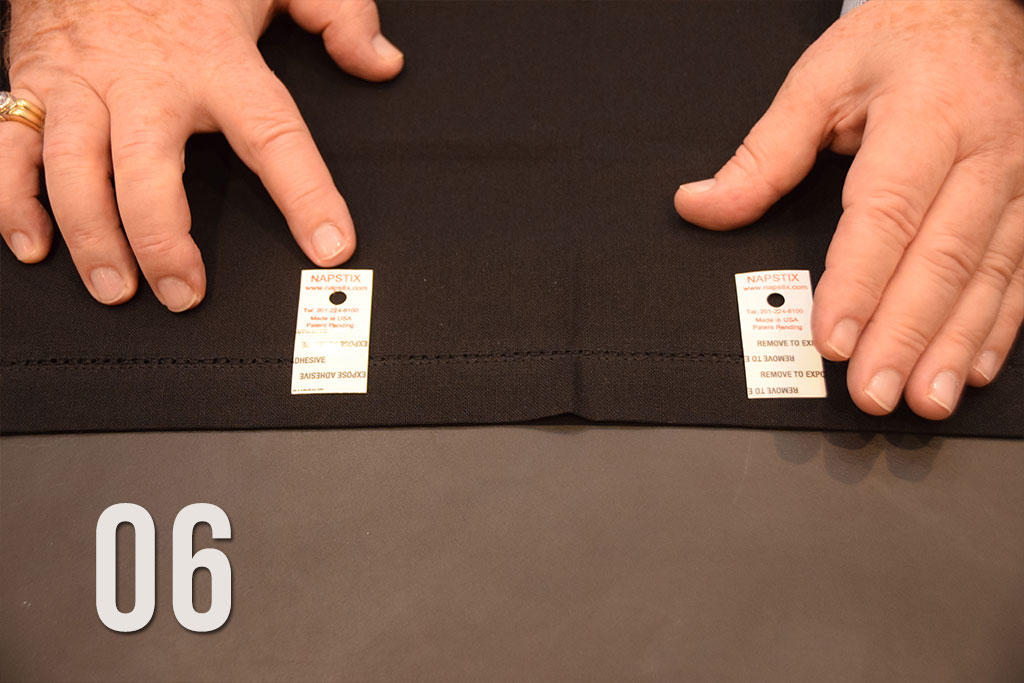
2.) Position the two (2) different NAPSTIX approximately 4″ to 7″ apart from one another along the SAME side of the back of a napkin with the the clear adhesive positioned closest to napkin’s straight edge so the punch hole is facing away from the napkin’s edge (see picture 6). Then press down and apply firm pressure so the clear adhesive on the back of each NAPSTIX sticks to the surface of the napkin. (see picture 6)
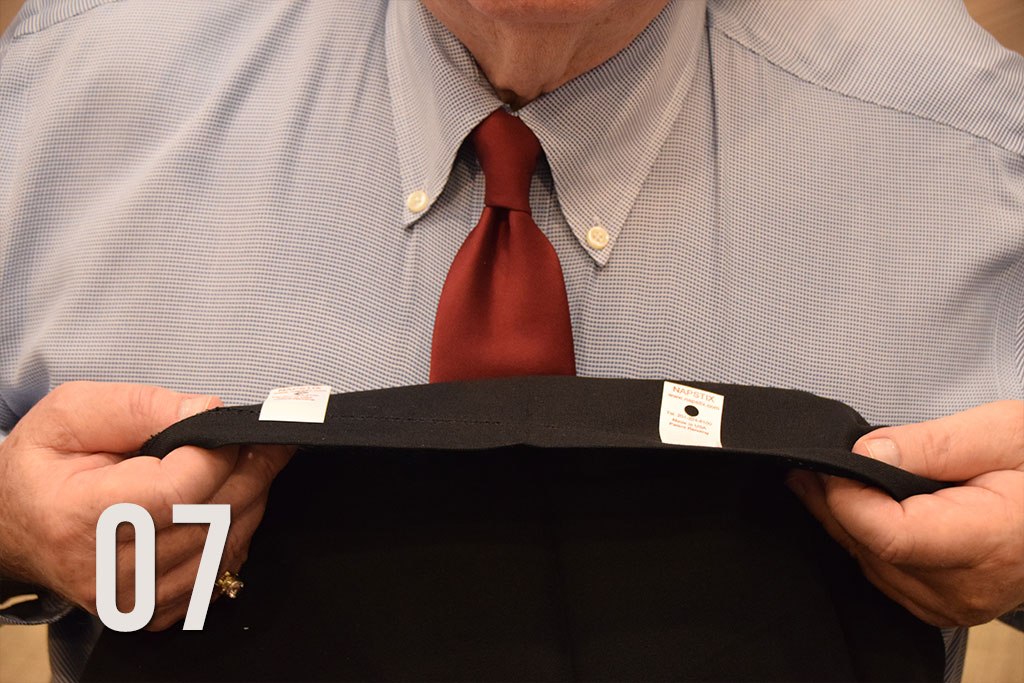
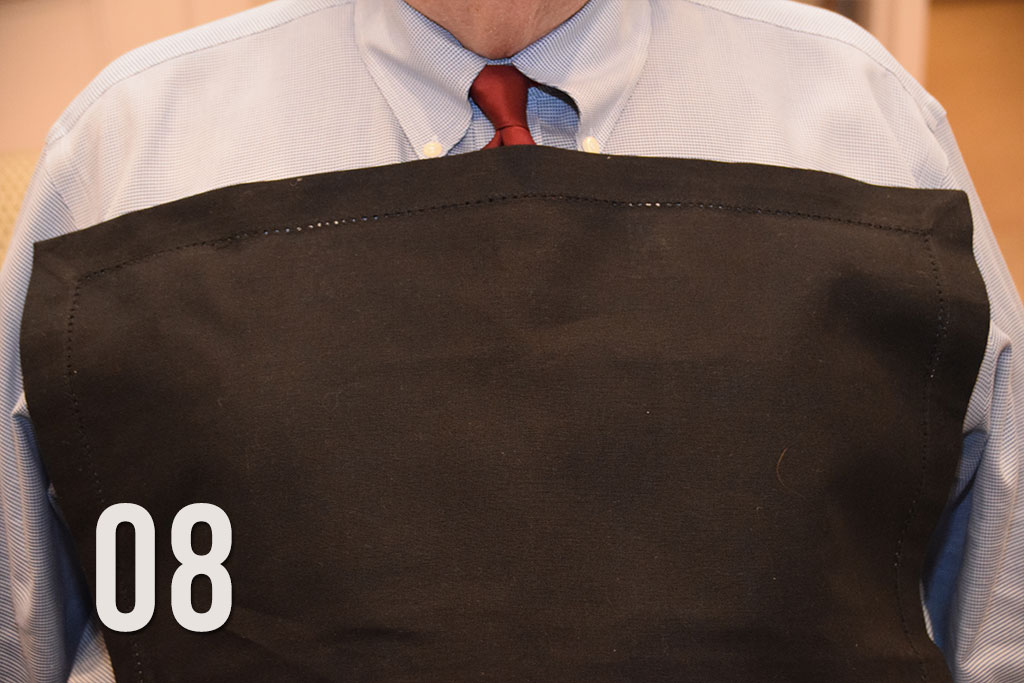
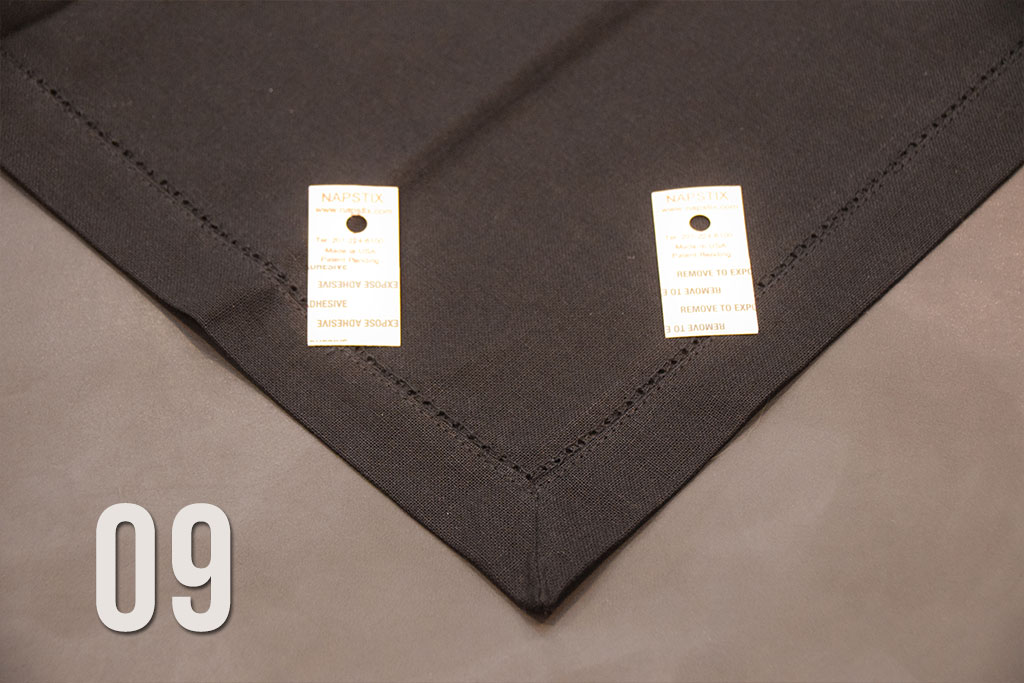
3.) Now that the two (2) different NAPSTIX are stuck to the napkin, peel off the other two black printed liners facing you to expose the clear adhesive and discard liners. Affix the NAPSTIX-Napkin combination directly to your shirt or blouse by pressing down and applying pressure HIGH UP on shirt or blouse for maximum protection from food stains and splatters. (See pictures 7 & 8 and 9 & 10)
4.) If you are wearing a TIE, position the tie between two (2) different NAPSTIX to offer maximum protection. This may be accomplished in two (2) different ways:
4A) The first way is by placing two different NAPSTIX along the same side of a napkin as discussed in paragraph 2 above. (see pictures 6 ,7 and 8)
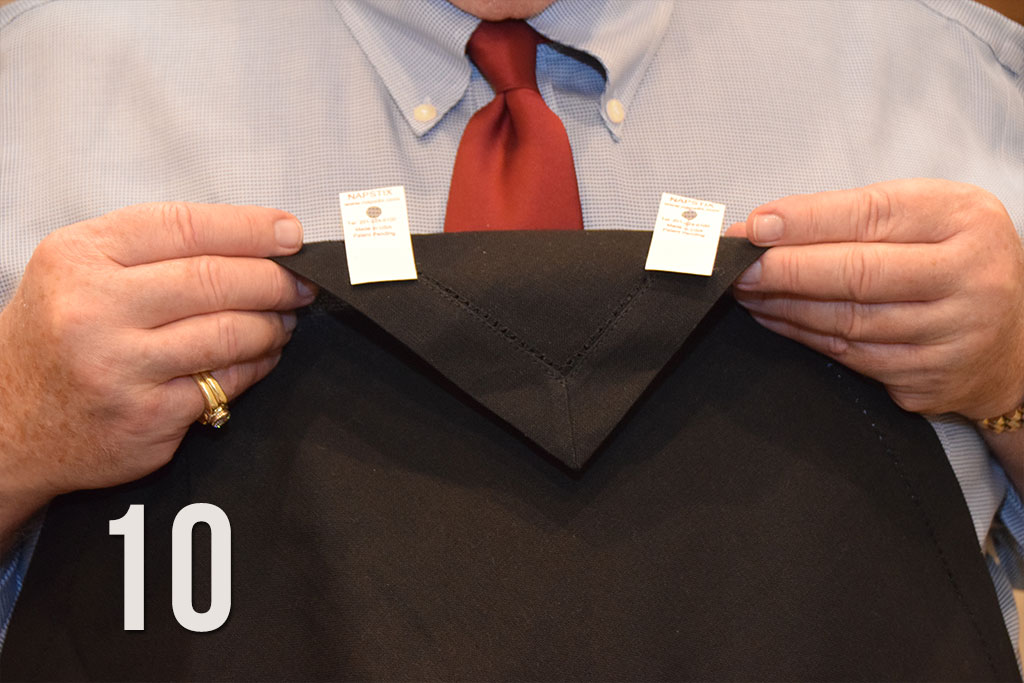
4B) The second way is by attaching two (2) different NAPSTIX approximately 3-1/2″ apart from one another and below a corner of the napkin with the punch hole facing away from the corner of the napkin. (see picture 9)
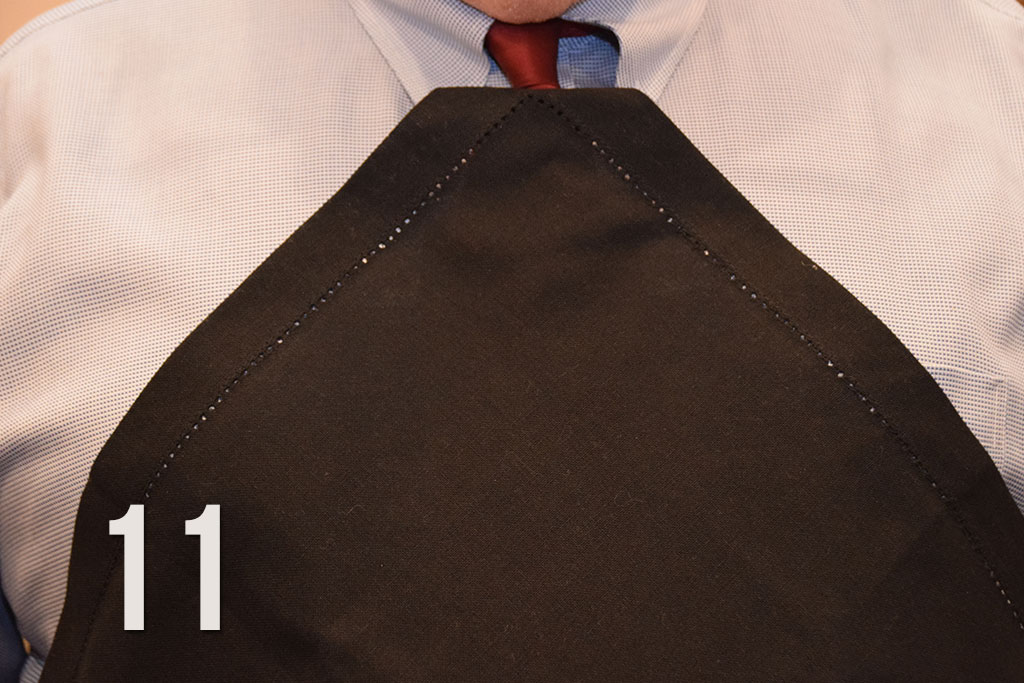
4C) Remember, to position your Tie in between the two (2) different NAPSTIX. Then press down and apply firm pressure so the two (2) clear, tacky adhesive areas firmly sticks to your shirt or blouse. Apply the NAPSTIX-napkin combination HIGH up on you shirt or blouse to receive maximum food stain and drink splatter protection. (See pictures 7 & 8 and 10 & 11)
